I love having get-togethers at my place. I prefer smaller, more intimate gatherings of six or fewer friends. If the party is too large, I feel you can’t really talk and get to know your guests.
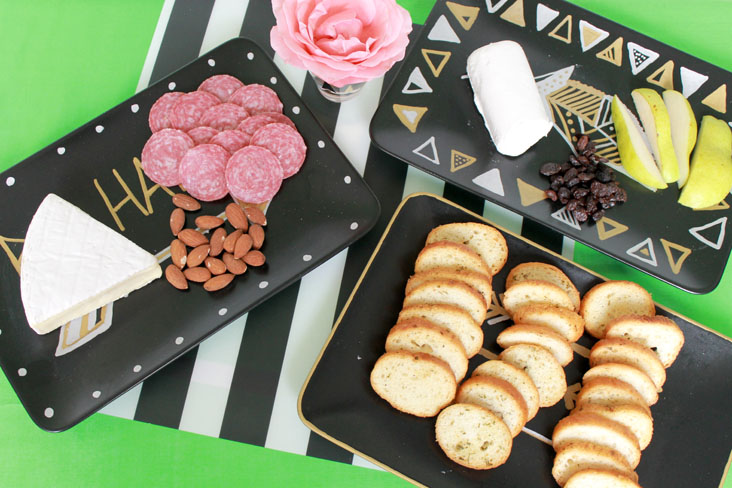
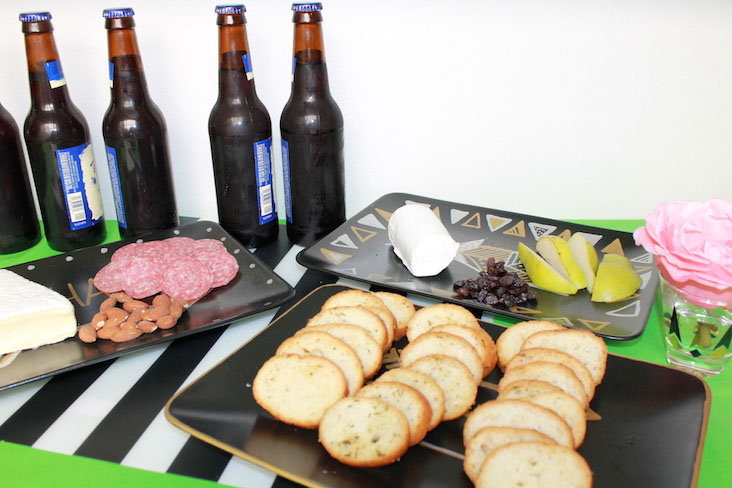
When friends come over, I always serve simple but tasty platters with cheese, fruit, nuts and crackers for everyone to nibble on. I thought it’d be fun to create inexpensive serving trays with trendy designs on them to display the savory morsels. These trays remind me of something you’d buy at Urban Outfitters but for a fraction of the price.
 Supplies:
Ceramic party trays (I bought these at
IKEA.)
Oil-based Sharpies (Make sure the Sharpies are oil-based. If you use regular Sharpies, the designs won’t last long.)
Ruler — optional
Cotton swab
Rubbing alcohol
Paper or pencil to jot down your ideas
 Instructions:
 Step 1:
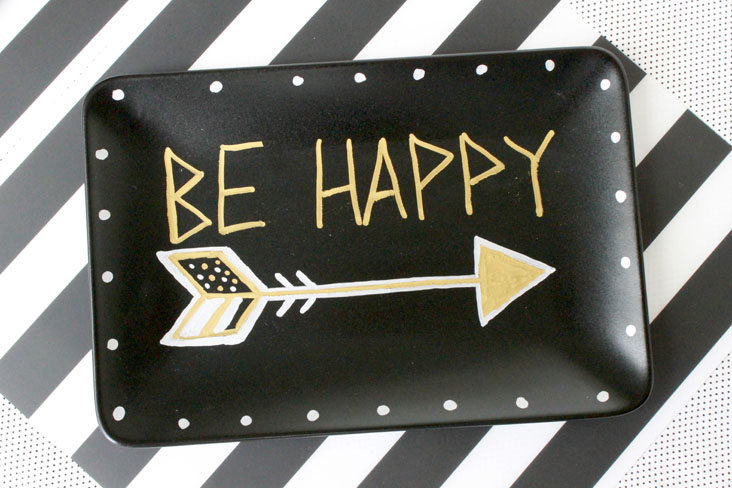
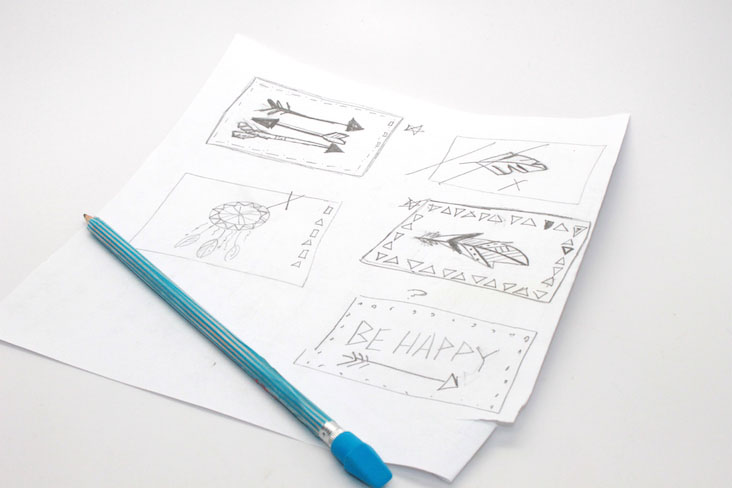
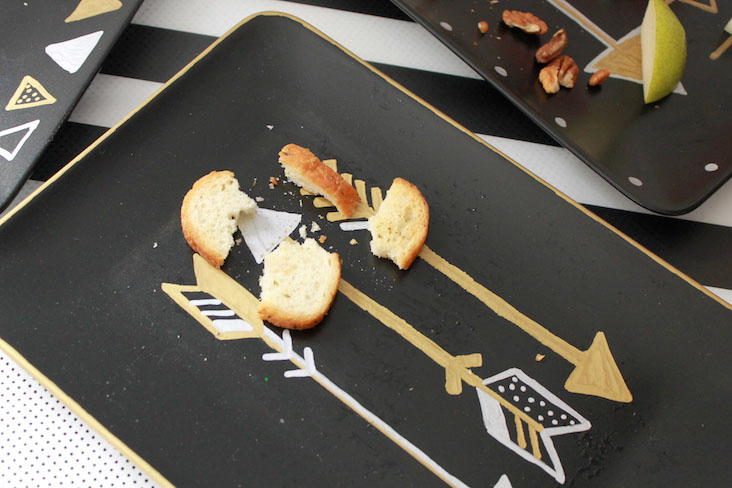
 Sketch out your designs on a piece of paper. I thought I’d go for a more Native American motif for my designs, with arrows and feathers. I sketched out a few. Most of them didn’t work or I didn’t like how I drew the arrows. After a few tries, I finally drew some good ones. I picked out my favorites to recreate on the trays. If you’re not confident about your drawing skills, you can always write a saying on your tray and draw simple shapes to go with it.
 Step 2:
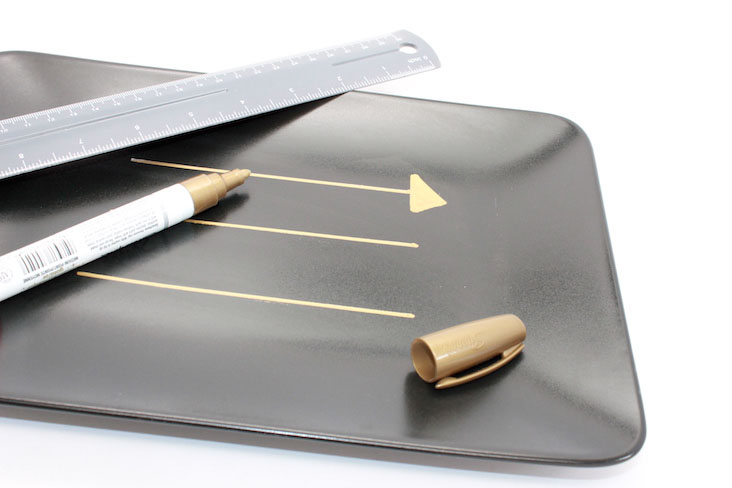
 Draw your designs. Since I was drawing arrows, I used a ruler to help me keep the lines straight. You can also use painter’s tape.
 Step 3:
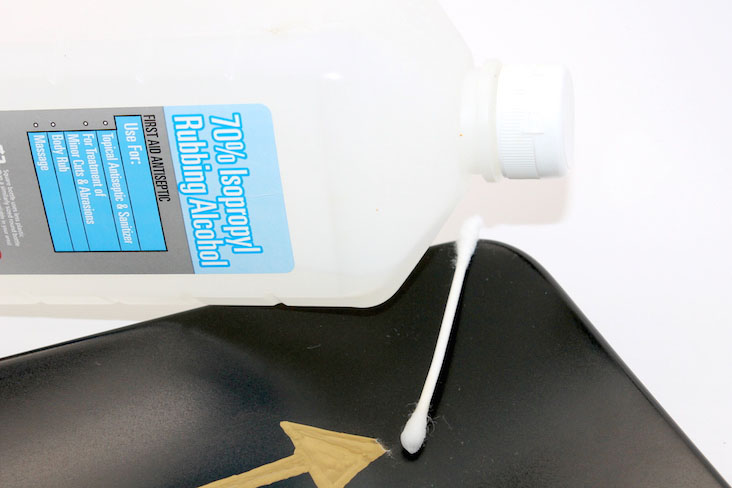
 If you make a mistake, no sweat! You can easily erase it with a cotton swab and rubbing alcohol. If you make a really big mistake or want to start over, simply use a paper towel dabbed with rubbing alcohol. If you do this, make sure you clean the tray off well so there are no residual smudges.
 Step 4:
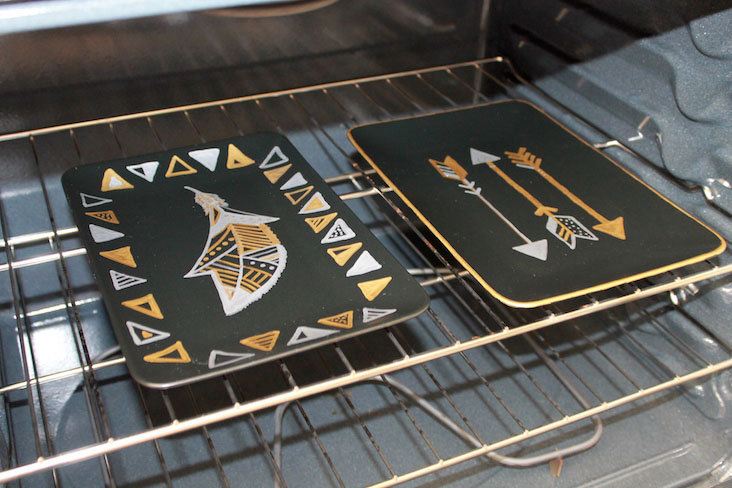
 Pop your trays in a 400-degree, preheated oven for 30 to 40 minutes to seal in the designs. Keep your tray in the oven until the oven cools completely.
 Step 5:
 Wash it and then serve your favorite cheese, crackers and party appetizers on it.
 Step 6:
 After the party is over, hand wash the trays. I can’t promise your designs won’t come off if you put them in the dishwasher. However, if you must put them in the dishwasher, put them on the top tray and test your luck.