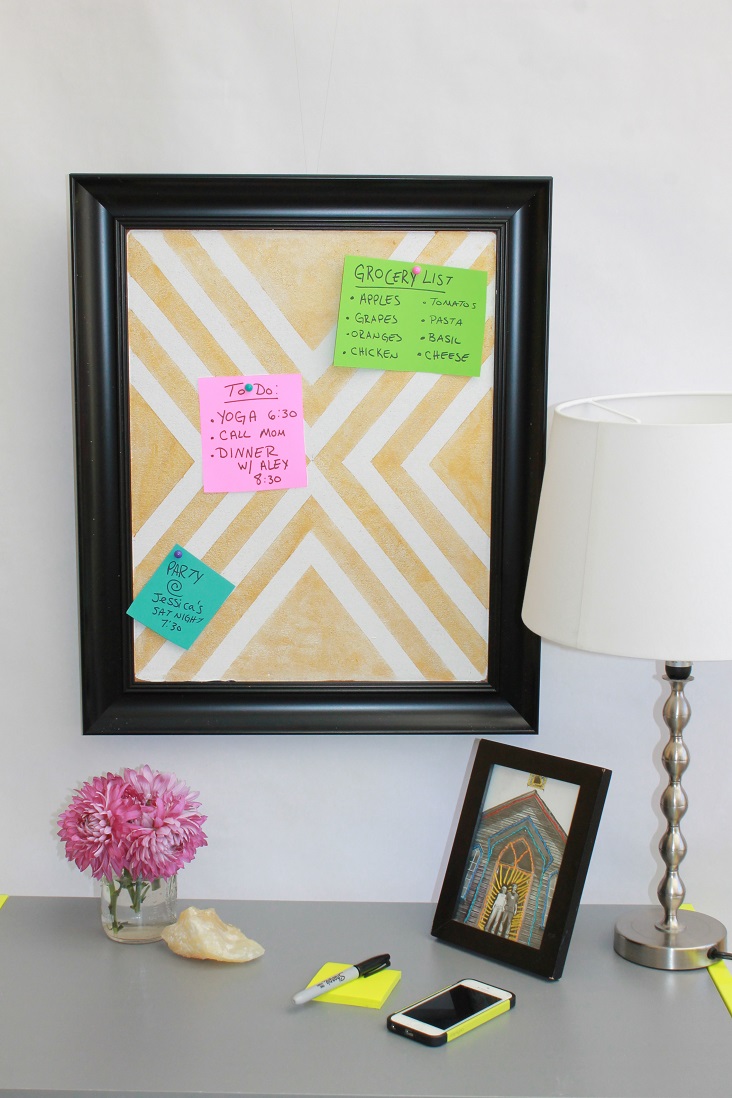
My biggest goal of 2016 is to become organized. I’ll be honest: I try real hard to keep a tidy house, but my right-brained self struggles with it. I do have the best intentions. Thank goodness for my left-brained husband. He is great at getting rid of the clutter and running a tight ship. This is a quality I wish I had.
That’s why I decided to turn a plain Jane corkboard into a work of art. I’m going to use this as inspiration to help me stay organized and tack my to-do lists on. It’s going to work, right?
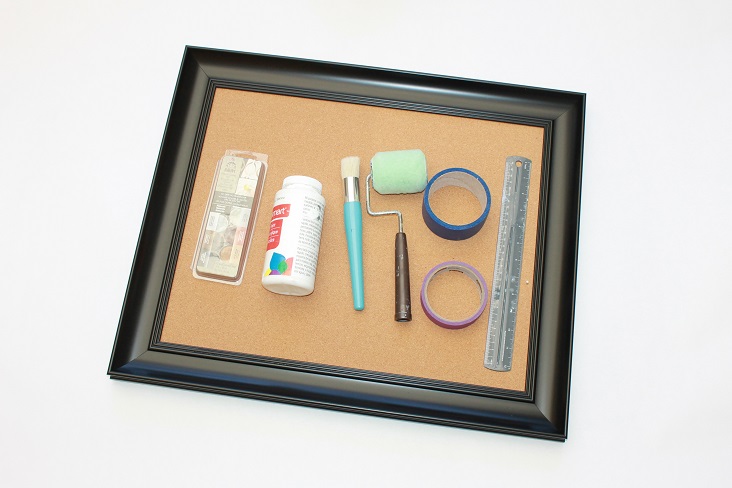 Materials needed:
-Corkboard (you can choose a framed or unframed one, or better yet, use one you already have)
-Mini paint roller
-Foam brush (not shown; I realized I needed this afterward)
-Stencil brush
-Stencil cream
-Painter’s tape
-White craft paint
-Ruler
Instructions:
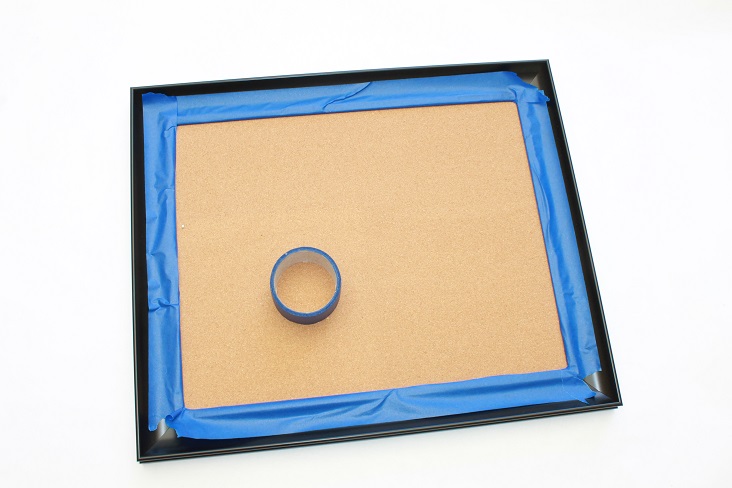 Step 1:
 Cover your frame with painter’s tape. Note: If you have a plain corkboard with a wooden frame you’d like to paint, do this first and then follow the instructions as directed.
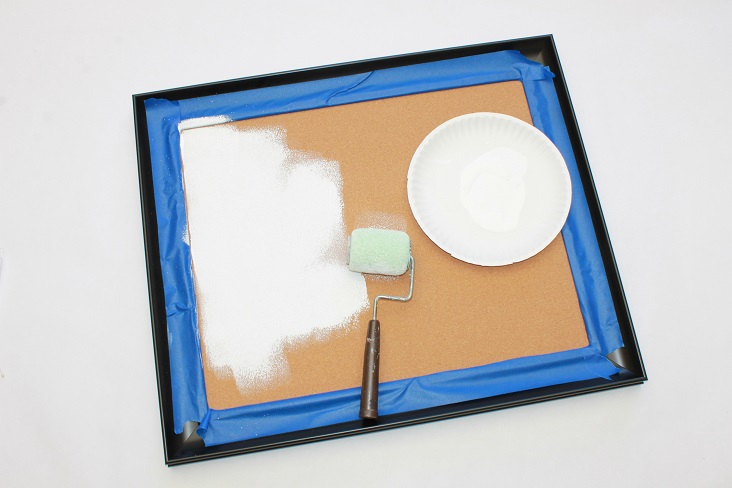 Step 2:
 Paint your corkboard. I found the mini roller makes things a lot quicker when you’re doing large surfaces in one color. If you don’t have one, you can use a foam brush. At this point, I realized the mini roller doesn’t go all the way to the edges of the corkboard, so I used a foam brush to get into the edges. I then used the mini roller again to blend in the strokes. Let dry.
 Step 3:
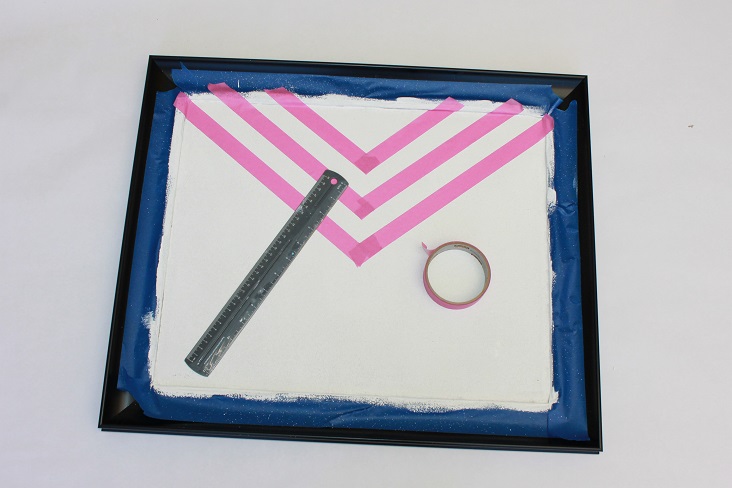
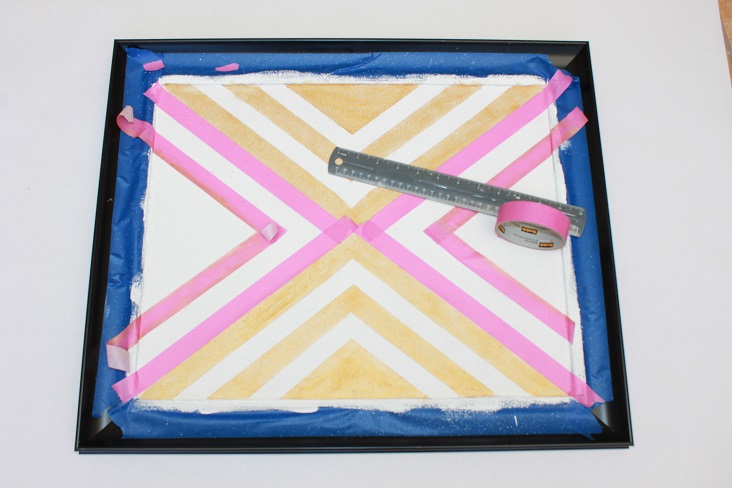
 Use your ruler and thin painter’s tape to create 1” diagonal lines on your corkboard. The top point should be the center of the cork board.
 Step 4:
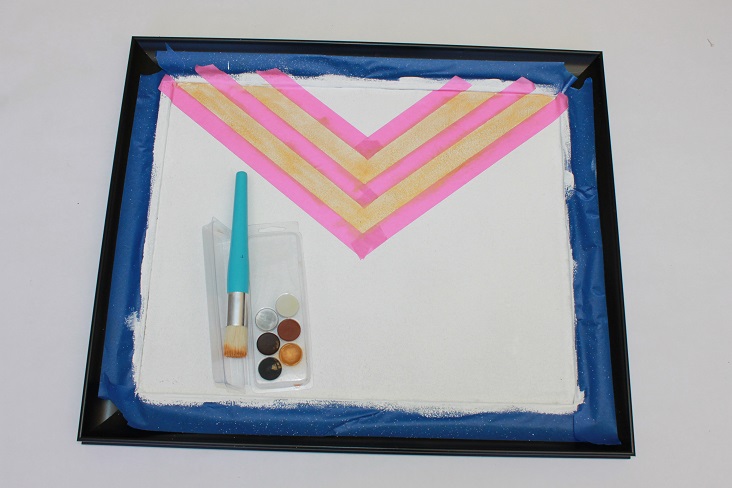
 Use your stencil cream to paint in between the tape lines. Let dry. (This is the first time I worked with stencil cream. It’s a bit thicker than regular paint and doesn’t glide as smooth as paint. Also, there wasn’t much of it. I had exactly enough stencil cream for this project.)
 Step 5:
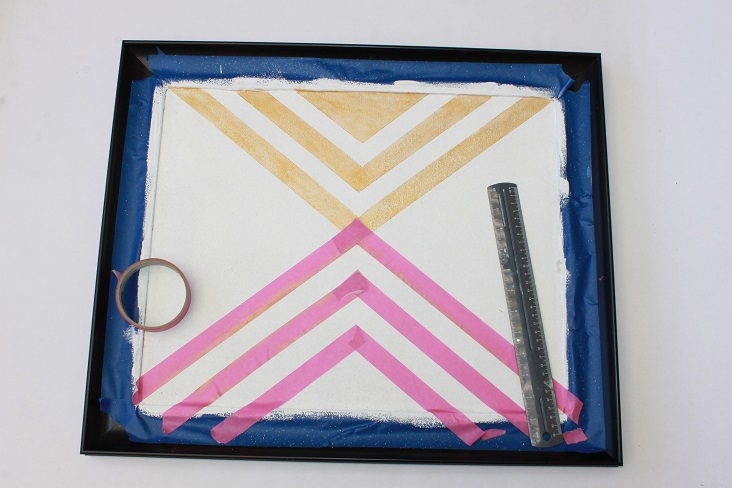
 Peel away the tape. Make more 1” diagonal lines with the painter’s tape on the opposite side of the corkboard.
 Step 6:
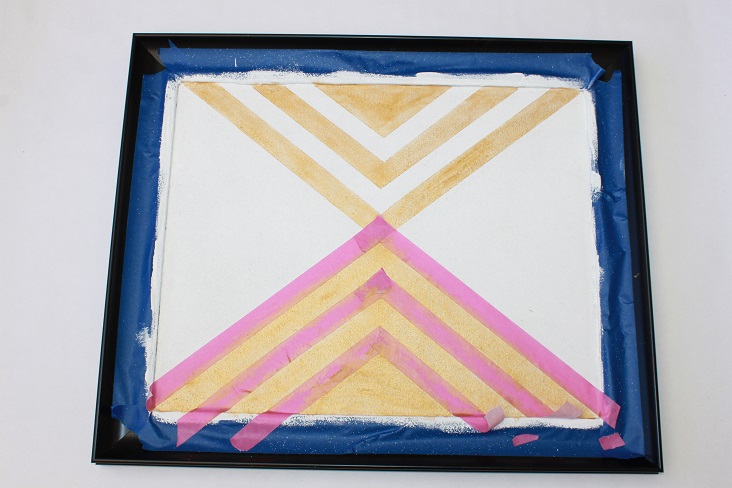
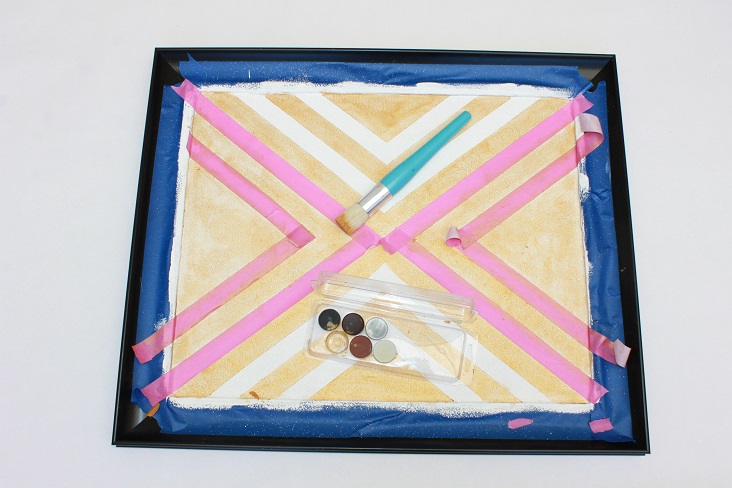
 Paint the second side of the corkboard with your gold stencil cream. Let dry.
 Step 7.
 Peel away the tape and then create more 1” diagonal tape lines on the edges of the design.
 Step 8:
 Paint the rest of the cork board in between the tape lines.
If you’re inspired by this corkboard idea, try showcasing your travels with
this corkboard project.