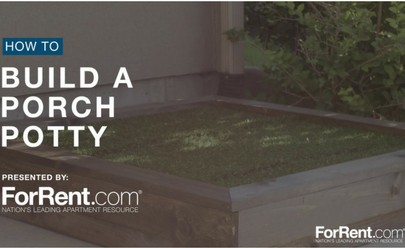
When your dog has to go, it’s up to you to let them out and make sure they do their business. This can be especially time-consuming if you live in a city and have to clean up after them. In response, many pet owners are turning to Porch Potties as a convenient way to give their dogs more independence and make clean-up much easier. Instead of going out and buying one, however, you can always build your own. It’s actually pretty easy. ForRent.com is here to show you how to do it.
To get started you’ll need to purchase the right materials for your DIY Porch Potty. You can find a list of all the materials for the project at the bottom. Note that the length and amount of boards you’ll need will vary depending on the size of your project.
Cuts
You can find a list of the cuts you need to make at the bottom of this post.
Construction Steps
To construct your own Porch Potty, first cut all the pieces as indicated by the cut list above and sand them. After doing that, you’ll want to get the wood ready for staining by wiping them down to remove dust particles. You can then stain the wood with your choice of stain.
Next you’ll be assembling the pieces of the Porch Potty. Assemble the base and top using two-inch wood screws. Make sure you notch out a place for the horizontal supports and drain. Next, add lower supports to hold the sloped base and drain. Then drill a hole into the sloped base big enough for the drain pipe to fit through, then insert the drain into the hole. Place the sloped base on top of the previously attached lower supports.
Now you can cut the shower pan liner. Make sure it’s slightly larger than the inside dimensions of the frame, then place it on the base. Once it’s placed, staple the liner to the frame. Place the horizontal supports into the notched out area. Then cut out the drain from the shower pan liner. You’ll want to then add expanded metal to support the turf.
Now it’s time to cut the turf to size. After you’ve done that, cut holes in the back of the turf to allow liquid to pass through. Next, place the turf on top of the expanded metal. Hold it all together with the frame.
And now you have your very own Porch Potty ready to go.
If you’ve found this video useful, please give us a thumbs up, and hit the subscribe button to receive more quick fix videos right to your inbox. Thanks for watching and see you next time.
Materials
2×6 stud – Length and amount of boards needed varies depending on the size of your project, for ours we needed to purchase two 2 in. x 6 in. x 92-5/8 in boards.
1×4 – Length and amount of boards needed varies depending on the size of your project, for ours we needed to purchase two 1 in. x 4 in. x 6 ft boards.
1×2 – Length and amount of boards needed varies depending on the size of your project, for ours we needed to purchase one 1 in. x 2 in. x 8 ft boards.
Plywood – Length and amount of boards needed varies depending on the size of your project, for ours we needed to purchase one 1/4 in. x 4 ft. x 4 ft. board.
Stain – You can chose any stain you’d like, but we chose Jacobean for this project.
Shower Pan Liner – Sold by the foot, we asked for 3ft x 5ft.
Corner Drain Pipe – Used for the drain
Drain Pipe – Used for the drain
PVC Pipe – cut to 3 foot pieces.
Steel Lath – Cut to 3 foot pieces.
Turf – We asked for a 1 ft wide strip from the roll then cut the length of the 1 ft strip into 1ft x 3ft strips.
Cuts
2×6 – Cut 2 boards to 36 inches and 2 boards to 33 inches.
1×4 – Cut 4 boards to 36 inches with 45 degree opposite angles at each end.
1×2 – Cut into 4 equal length boards, approximately 24 inches each.
Plywood – Cut to 33 inch x 33 inch square.
Shower Pan Liner – Cut to 34 inch x 34 inch square.
Steel Lath – Cut down to two 3 foot x 27 inch lengths.
Turf – Cut down to three 3 foot x 1 foot lengths.
PVC Pipe – Cut down to three 3 foot lengths.
Video Steps
Step 1 – Cut and sand all the pieces you’ll need.
Step 2 – Prep for staining by wiping all the pieces to remove any dust.
Step 3 – Add your choice of stain.
Step 4 – Assemble the base and top using two inch wood screws.
Step 5 – Notch out a place for the horizontal supports and drain.
Step 6 – Add lower supports to hold the sloped base and drain.
Step 7 – Drill a hole into the sloped base big enough for the drain pipe to fit through, then insert the drain into the hole.
Step 8 – Place the sloped base on top of the previously attached lower supports.
Step 9 – Cut shower pan liner slightly larger than the inside dimensions of the frame and place it on the base.
Step 10 – Staple it to the frame.
Step 11 – Place the horizontal supports into the notched out area.
Step 12 – Cut out the drain from the shower pan liner.
Step 13 – Add expanded metal to support the turf.
Step 14 – Cut the turf to size.
Step 15 – Cut holes in the back of the turf to allow liquid to pass through.
Step 16 – Place the turf on top of the expanded metal.
Step 17 – Hold it all together with the frame.
Get started today on your search for your next apartment home on ForRent.com.
*We can’t promise you that the following techniques won’t get you in trouble with your property manager. Before you start any of these projects, make sure that you get written permission.